I first heard of Neumann Films on Twitter. In July Luke Neumann had daily freebies, tracks you could download for free. One for everyday in July that he had composed, and 18 tracks for a web series The Dark Knight he'd also composed. All you had to do was give credit to Luke, give the title of the song and you can use all of the daily freebies royalty free in your work. Since I shoot and edit, the thing I was really missing in my workflow was a good variety of music. All the daily freebies are really good with a little bit of every type of music to set the right mood.
I really liked all the freebies Luke offered so I decided to get the Teaser toolbag and Horror music collection. I have to say the 50 bucks spent is worth every penny. Both albums have tons of tracks and I can easily see using everything in both albums.
The Teaser Toolbag is a library of sounds, elements, percussion beats and songs with over 3.2 gb of content. Everything is broken down into 3 different folders and categorized by beats per minute ranging from 80bpm all the way upto 140 bpm. You can mix and match each file for upto 2000+ unique song compostions.
The first folder In The Teaser Toolbag has 7 sets of intros all the same content but at different beats per minute. At 80bpm there are 14 different intros all ranging just below one minute. Then 90bpm thru 140bpm range from 10 to all 14 of the same tracks at 80bpm.
Also in the first folder there are 3 cymbal rises, 13 different hits, 9 orchestral sound designs, 30 different sound designs and 11 full songs ranging in emotions they set. Most of the full songs have a nice upbeat tempo to them for action, a few a little slower for dramatic scenes. The two songs that really stuck out were Edge of reason and Space Debris both of these songs gave me a sense of helplessness and sadness. I could see using these for a scene for something life changing in a big way.
Teaser Toolbag 2 is all orchestra tracks ranging from 80bpm to 140bpm. At 80bpm you get 29 different tracks, then upto 110bpm the same 29 tracks and from there you get 28 for 110bpm, 25 for 120bpm, 21 for 130bpm and 20 for 140bpm.
Teaser Toolbag 3 is all percussion tracks. You get 9 different tracks at the 80bpm and ranging from 8 down to 5 the faster the tempo.
The Horror music folder is broken down into 6 different folders. The first folder is bonus tracks full songs ranging from a minute upto 2 and a half minutes. And you get 5 in total.
The second folder is digital atmosphere and there are a total of 17 errie tracks all a minute and a half.
3rd folder is the Hits folder and there are 13 different "hits" The best way to describe the hits are the loud noise right before something is about to happen.
4th folder is orchestral atmosphere and you get 2 in total.
5th folder is orchestral rises and there is 5 in total.
The last folder is sound design, the best way I can describe it is tracks I would use to add to the other sound effects in the album to create the overall audio for a scene. There are 51 different sound design tracks.
The Horror music collection is great overall, you get alot of really creepy and scary sounds to score a film with. I really like the full songs.
Listening to the songs on the horror album I got a nice Halloween vibe right off the bat. Hearing them I could easily see were they could be used when scoring. Geniside is one I really dug. It gave me the Halloween movie series right away, when Micheal is stalking his victim. And Horrorcast I could see the bad guy chasing someone thru the woods.
Right now if you buy the Teaser Toolbag you will get free updates to the album. Which will include new percussion, drum hits, sound design elements, intros, orchestral tracks and even full songs. The Teaser toolbag is 39.99 but will go up to 45.99 when the next updates are released. Your email will be added to a list and every time an update is added you'll get a free zip file containing the new music. Also right now Neumann films has the composers toolbag which has 25% savings and it includes the The Trailer toolbag, The Horror movie music and Teaser toolbag for 74.99
Luke also offers photography and video presets on his site.
I'm very pleased with both Teaser toolbag and Horror music album, both have a ton of really awesome tracks, beats, and full songs. If you need some good music for your edits give Neumann films a look, you won't be sorry.
http://www.neumannfilms.net/
Tuesday, August 7, 2012

Monday, July 30, 2012
my photography
Here's some of my favorite pictures I've taken over the past few years not from film sets. Most were shot using a Zeiss 50mm, a few with 17-50mm 2.8 and the last pic was taken with a 8mm fisheye lens.


 T T |
 |


Tuesday, July 24, 2012
cpm follow focus review
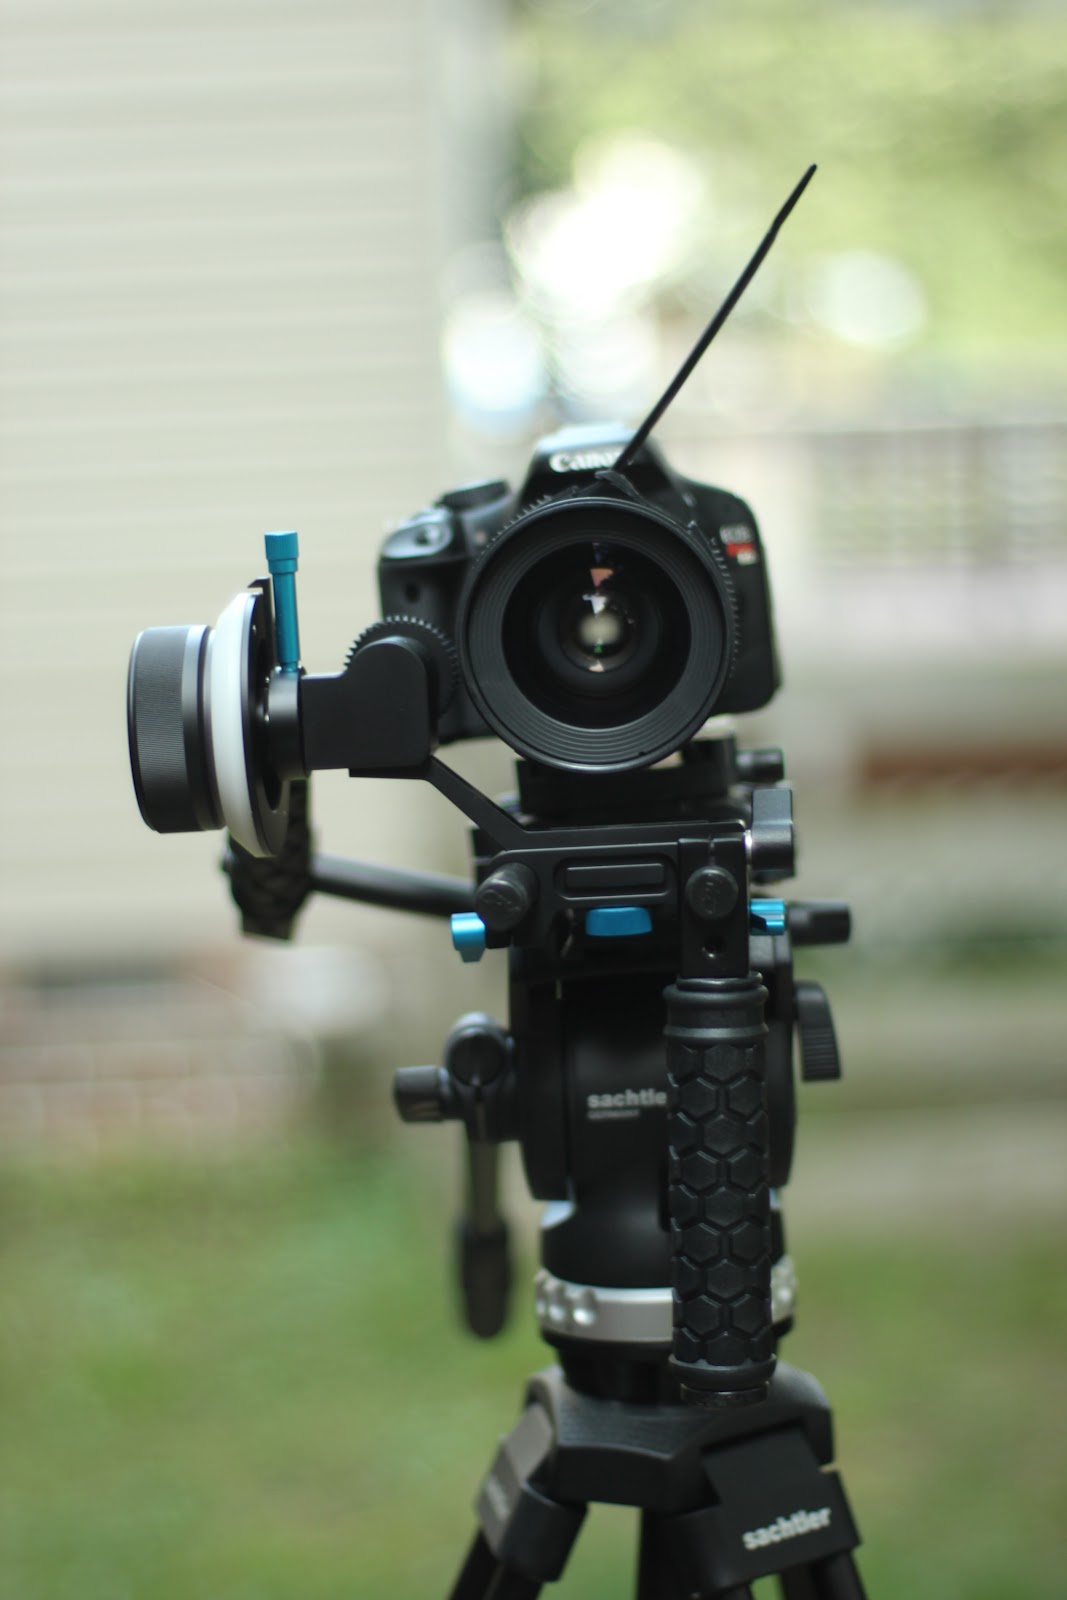
The knob is oversized compared to other follow focuses and makes it really nice when shooting with a shoulder mount rig. When you reach for the follow focus to pull focus, the knob is very easy to find and adjust. If using a tripod the oversized knob can be marked with a dry erase marker for your focus points. Both the knob and gear turn smoothly. This follow focus has just a little backlash which is nice for a follow focus in this price range. It performs nicely in this catagory.
It comes with one supplied lens gear which is one of the nicest and easiest ones to put on and take off. The lens gear uses a zip tie method but it can be switch from lens to lens, unlike other zip tie lens gear that are permanent once applied.
One thing worth mentioning about the CPM follow focus is that the gear isn't reversible. So when you are using smaller prime lenses, if you rack focus with your left hand, the gear is too far forward on the rails to reach the lens. The whole unit has to be switch over to the right side of the rails to reach smaller lenses, which isn't a big deal if you're used to using either hand to pull focus.
Overall, I'm very pleased with the CPM follow focus. Build quality is what you would except for CPM which is very good, and you'll get great customer support from their team. The CPM follow focus feels and works like a much more expensive unit. If you're in the market for a follow focus I would recommend this one.
http://www.cpmcamerarigs.com/Carbon_Rod_Kit_s/3.htm




 |
| If using a shorter prime on the left the gear is too far forward |

Monday, July 16, 2012
color space adobe and srgb
I visit numerous sites and blogs to learn about gear and settings on DSLR's and one thing I've never seen or noticed until recently is what color space to set your Canon DSLR to. I've always used the set color space on my cameras SRGB. Shane Hurlbut on his site http://www.hurlbutvisuals.com/ talks step by step on how to set up your Canon DSLR and color spaces. I found it interesting that he mentioned that he uses the Adobe RGB color space. So I decided to test both color spaces to see what I could come up with.
I shot with my t3i, Zeiss 50mm set at 1.4. On one card I shot on Adobe color space and the other card on SRGB color space. Picture profiles used were neutral 0,-4,-2,0, Flaat 10n 0,-4,-2,0, flaat 10p 0,-4,-2,0, portrait 0,-4,-2,0 and on a few I set everything to 0 except adjust skin tone one click to red.
When editing, I start out in Vegas Pro11 and grade in Magicbullet Looks2 and noticed either something wasn't working in either both or one of the softwares. In Looks 2 my normal grading, which is adjusting the curves, adding contrast and the 3 wheel corrector, none of the adjustments were doing what they usually do. All the adjustments were just washing out the image, also the scopes and waveforms weren't working so I had nothing to go by to tell what was actually being done to the footage. When I clicked back in Vegas the image was totally different from what Looks was showing and far from ideal. Usually the adjustments made in Looks2 carry over into Vegas smoothly and accurately. So I had to make small adjustments in Looks and see what was being done in Vegas, this took a while to grade the footage. I got the footage close to where it needed to be as far as finding true skintones but it would of went a lot faster with the aids of the scopes and waveform.
Even though the grading was done by eye and clicking back and forth to each program I will have to say the Adobe colorspace on all the picture profiles look nicer both in skintones and overall color. I will now be using the Adobe color space for all my shoots. As far as picture profiles I'm stuck between neutral and the Flaat 10p profiles, they both produce really natural and pleasing skintones and colors.
Once I figure out what's going on with the editing software I will reshoot the footage and grade properly to get a better examples of each.
Here's an example of what was going on in looks2 and Vegas two same grade but two different images
footage adobe colorspace
http://youtu.be/pv4APivbWlU
Srgb colorspace
http://youtu.be/zAdsAZEcMW4
I shot with my t3i, Zeiss 50mm set at 1.4. On one card I shot on Adobe color space and the other card on SRGB color space. Picture profiles used were neutral 0,-4,-2,0, Flaat 10n 0,-4,-2,0, flaat 10p 0,-4,-2,0, portrait 0,-4,-2,0 and on a few I set everything to 0 except adjust skin tone one click to red.
When editing, I start out in Vegas Pro11 and grade in Magicbullet Looks2 and noticed either something wasn't working in either both or one of the softwares. In Looks 2 my normal grading, which is adjusting the curves, adding contrast and the 3 wheel corrector, none of the adjustments were doing what they usually do. All the adjustments were just washing out the image, also the scopes and waveforms weren't working so I had nothing to go by to tell what was actually being done to the footage. When I clicked back in Vegas the image was totally different from what Looks was showing and far from ideal. Usually the adjustments made in Looks2 carry over into Vegas smoothly and accurately. So I had to make small adjustments in Looks and see what was being done in Vegas, this took a while to grade the footage. I got the footage close to where it needed to be as far as finding true skintones but it would of went a lot faster with the aids of the scopes and waveform.
Even though the grading was done by eye and clicking back and forth to each program I will have to say the Adobe colorspace on all the picture profiles look nicer both in skintones and overall color. I will now be using the Adobe color space for all my shoots. As far as picture profiles I'm stuck between neutral and the Flaat 10p profiles, they both produce really natural and pleasing skintones and colors.
Once I figure out what's going on with the editing software I will reshoot the footage and grade properly to get a better examples of each.
Here's an example of what was going on in looks2 and Vegas two same grade but two different images
 |
| after graded in looks 2 image is washed out |
 | |||||||
| going from looks2 into vegas pro 11 |
footage adobe colorspace
http://youtu.be/pv4APivbWlU
Srgb colorspace
http://youtu.be/zAdsAZEcMW4
Monday, July 9, 2012
Bargain condition lenses "Olympus"
I just got a Kowa 16h anamorphic lens and I wanted to see how wide I could go on the taking lens. I needed lenses with a small front filter thread to fit onto the anamorphic clamp. Zeiss contax mount lenses would of been my first choice but since they are around $300 dollars for one and only being a f2.8 lens, I decided to look for some cheaper alternatives.
I looked at a few different brands I already owned and most of the 28mm and 35mm were out of stock or they only had one or the other. So I looked at Olympus lenses, and found they had both the 28mm and 35mm in stock but they were what Keh calls "bargain condition". Bargain means 70-79% of original condition. They may show more than average wear for the age of the item, or may have dents, dings and/or brassing and finish loss. The glass may have marks, anomalies and/or blemishes that should not affect picture quality. So you basically get an ugly lens that performs.
At first I was hesitant to order a lens in this condition but for the savings I got 4 Olympus lenses for just over a hundred dollars, 28mm f2.8,35mm 2.8, 50mm 1.8 and a 70-200mm 3.8.
I received the lenses quickly and looked them over and to my surprise they pretty much looked like a lens they would offer in better condition. All the lenses had finish wear. None of the lenses had cleaning marks or dust. Only the 28mm had a small little ding near the front filter thread. Not bad for the money I spent. Also the 28 and 35mm were very small in size which makes them easy on packing and makes for a more stealth look if shooting in crowds.
I decided to do a quick test to see how the color and bokeh looked compared to a few of my other lenses. Zeiss 50mm 1.4, Pentax super takumar 50mm 1.4, Canon 50mm 1.8, Samyang 35mm 1.4 and to cover all three a 17-50mm 2.8 zoom.
All shots were set to standard profile with everything set to 0. No grading was done so as not to effect the final image. Iso for all f8 shots were at 160 and iso for all shots 2.8 and faster set at 100, with these I used a lightcraft nd fader.
At first look it seems all the lenses colors are pretty close, except the Pentax 50mm has the yellowish tint due to its coating which fits what I was shooting giving it a nice vintage look.
Overall, I'm pleased with the Olympus lenses. They are small, have a decent f stop, bokeh looks pleasant and the 28mm and 35mm focus down to well under a foot for close up type macro shots. If you're looking to get a lens to fill a certain focal range, or start a set of the same brand, don't hesitant to look at the bargain condition labeled lenses.
footage from the test
http://youtu.be/F-MP3PnBB_k


I looked at a few different brands I already owned and most of the 28mm and 35mm were out of stock or they only had one or the other. So I looked at Olympus lenses, and found they had both the 28mm and 35mm in stock but they were what Keh calls "bargain condition". Bargain means 70-79% of original condition. They may show more than average wear for the age of the item, or may have dents, dings and/or brassing and finish loss. The glass may have marks, anomalies and/or blemishes that should not affect picture quality. So you basically get an ugly lens that performs.
At first I was hesitant to order a lens in this condition but for the savings I got 4 Olympus lenses for just over a hundred dollars, 28mm f2.8,35mm 2.8, 50mm 1.8 and a 70-200mm 3.8.
I received the lenses quickly and looked them over and to my surprise they pretty much looked like a lens they would offer in better condition. All the lenses had finish wear. None of the lenses had cleaning marks or dust. Only the 28mm had a small little ding near the front filter thread. Not bad for the money I spent. Also the 28 and 35mm were very small in size which makes them easy on packing and makes for a more stealth look if shooting in crowds.
I decided to do a quick test to see how the color and bokeh looked compared to a few of my other lenses. Zeiss 50mm 1.4, Pentax super takumar 50mm 1.4, Canon 50mm 1.8, Samyang 35mm 1.4 and to cover all three a 17-50mm 2.8 zoom.
All shots were set to standard profile with everything set to 0. No grading was done so as not to effect the final image. Iso for all f8 shots were at 160 and iso for all shots 2.8 and faster set at 100, with these I used a lightcraft nd fader.
At first look it seems all the lenses colors are pretty close, except the Pentax 50mm has the yellowish tint due to its coating which fits what I was shooting giving it a nice vintage look.
Overall, I'm pleased with the Olympus lenses. They are small, have a decent f stop, bokeh looks pleasant and the 28mm and 35mm focus down to well under a foot for close up type macro shots. If you're looking to get a lens to fill a certain focal range, or start a set of the same brand, don't hesitant to look at the bargain condition labeled lenses.
footage from the test
http://youtu.be/F-MP3PnBB_k


Monday, July 2, 2012
Flaat picture profiles reviewed
Ever since I started shooting 2 years ago with my first Canon DSLR, I've always used neutral 0,-4,-2,0. Unless I wasn't going to grade the footage I would use the standard profile. Shooting neutral set at 0,-4,-2,0 has always made for a nice flat image that gives plenty of room in post to grade and get a nice looking final image.
Last year a few different picture profiles came out that could be downloaded on to your Canon DSLR. The one everybody talked about was Cinestyle. Cinestyle is supposed to give the flattest starting image out of all the profiles. I held off to see how others reviewed Cinestyle. Most liked it but said that it was an over all noisy image after grading. I have never used it because my editing software didn't have the needed lut curves to recover the information from Cinestyle profile.
I recently heard of another profile called Flaat made by Samuel Hurtado known by @Simillaar on Twitter. He made his profiles off of Canon's preset with his own added touches and best of all they can be graded without the lut curves, so any editing software will work with Flaat profiles.
Flaat profiles are set to give less noise in the final image over other profiles, and ease of grading for skintones. There are 2 sets of picture styles one based off the portrait profile, and the other neutral. Both sets have their pros and cons. The portrait set has color shift issues. Blue tones tend to go a little heavy on the cyan side, but overall has better skintones. The neutral set was made to avoid this color shift but the skintones don't turn out as nice.
There are four sets of each.
Flaat 09 gives 9 stops of dr
Flaat 10 gives 10 stops of dr much like Cinestyle
Flaat 11 gives 11 stops of dr
Flaat 12 gives 12 stops of dr but can be noisy
I choose Flaat 10n and Flaat 10p
You can find the Flaat profiles here
http://www.similaar.com/foto/flaat-picture-styles/download.html
I had just gotten a Kowa Bell & Howell 16h anamorphic and I wanted to try it out and decided to give the Flaat profiles a go against what I've been using neutral 0,-4,-2,0. I set both Flaat 10n and Flaat 10p at 0,-4,-2,0 also.
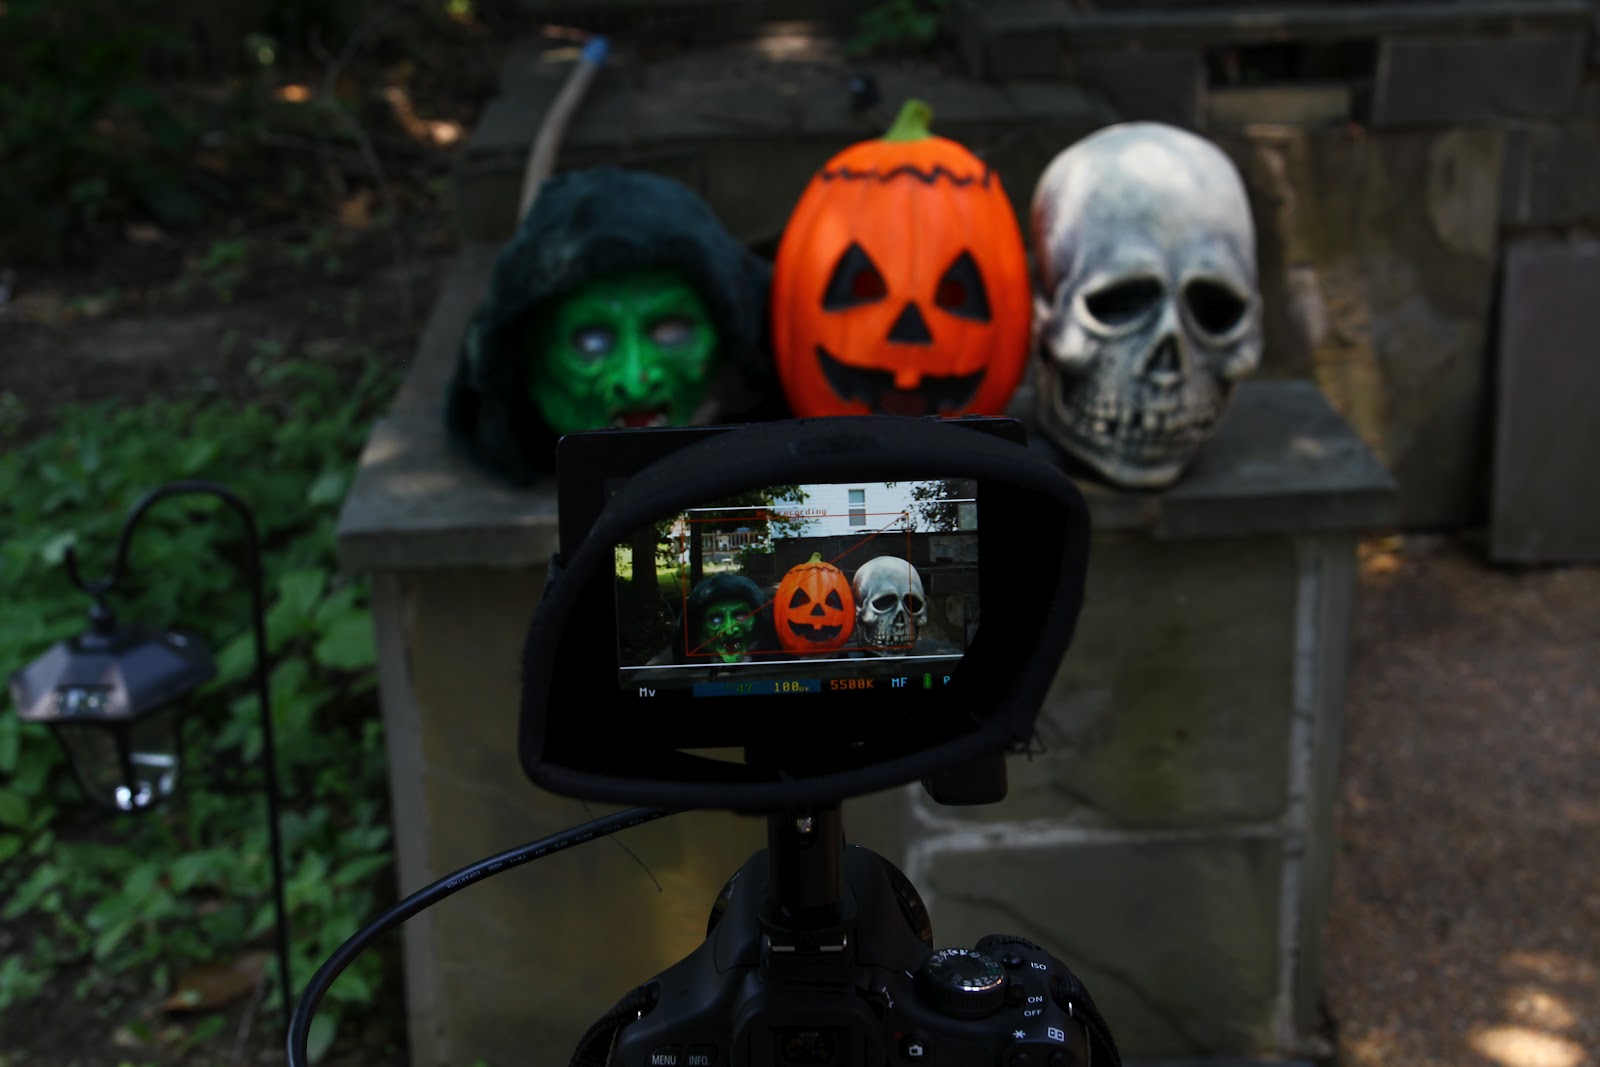
I shot using all three profiles on a Canon t3i with a Jupiter 9 85mm taking lens and the Kowa anamorphic lens. I used lightcraft nd fader when I stepped down to f2 and my Smallhd dp4 for framing the shots. The last three images I removed the fader nd and shot at f8. All three profiles start off with a flat image looking close to each other.
After all the footage was shot I began to edit in Sony Vegas pro 11 to get a timeline and graded in Magic Bullet Looks 2. I used a basic curve,contrast and 3 wheel color correction for all the clips. The curve adjustment for all were the same and I added the same amount of contrast to the clips. All the clips grading wise were very simialr in how I had to apply the color correction to each to get the vectroscope get to the upper third of the wheel known has the skintone line. Also with looks 2 there's a skin overlay which shows little dots over the person. The more dots the more the colors are corrected for skin color.
Neutral is easy to grade to get to the skin tone line in the vectroscope. And the image looked close to my subjects skin tone which is fair. The bokeh seemed to stay alittle flat but i wasnt graded for an overall image just the skin tones.
Flaat profiles are just has easy to grade. I applied close to the same correction to get the vectroscope where it needed to be.
Flaat 10n once graded for the skintone line ended up with more of a yellowish tint on the skin. But seemed to have more overall color in the image compared to neutral.
Next was Flaat 10p once graded for skintones gave a nice overall image. The skin color looked very good and the over all image looked nice and more colorful.
Here are the frame grabs of each. I noticed once rendered there was a color shift in the images making them more contrasty and yellowish.

Last year a few different picture profiles came out that could be downloaded on to your Canon DSLR. The one everybody talked about was Cinestyle. Cinestyle is supposed to give the flattest starting image out of all the profiles. I held off to see how others reviewed Cinestyle. Most liked it but said that it was an over all noisy image after grading. I have never used it because my editing software didn't have the needed lut curves to recover the information from Cinestyle profile.
I recently heard of another profile called Flaat made by Samuel Hurtado known by @Simillaar on Twitter. He made his profiles off of Canon's preset with his own added touches and best of all they can be graded without the lut curves, so any editing software will work with Flaat profiles.
Flaat profiles are set to give less noise in the final image over other profiles, and ease of grading for skintones. There are 2 sets of picture styles one based off the portrait profile, and the other neutral. Both sets have their pros and cons. The portrait set has color shift issues. Blue tones tend to go a little heavy on the cyan side, but overall has better skintones. The neutral set was made to avoid this color shift but the skintones don't turn out as nice.
There are four sets of each.
Flaat 09 gives 9 stops of dr
Flaat 10 gives 10 stops of dr much like Cinestyle
Flaat 11 gives 11 stops of dr
Flaat 12 gives 12 stops of dr but can be noisy
I choose Flaat 10n and Flaat 10p
You can find the Flaat profiles here
http://www.similaar.com/foto/flaat-picture-styles/download.html
I had just gotten a Kowa Bell & Howell 16h anamorphic and I wanted to try it out and decided to give the Flaat profiles a go against what I've been using neutral 0,-4,-2,0. I set both Flaat 10n and Flaat 10p at 0,-4,-2,0 also.
I shot using all three profiles on a Canon t3i with a Jupiter 9 85mm taking lens and the Kowa anamorphic lens. I used lightcraft nd fader when I stepped down to f2 and my Smallhd dp4 for framing the shots. The last three images I removed the fader nd and shot at f8. All three profiles start off with a flat image looking close to each other.
After all the footage was shot I began to edit in Sony Vegas pro 11 to get a timeline and graded in Magic Bullet Looks 2. I used a basic curve,contrast and 3 wheel color correction for all the clips. The curve adjustment for all were the same and I added the same amount of contrast to the clips. All the clips grading wise were very simialr in how I had to apply the color correction to each to get the vectroscope get to the upper third of the wheel known has the skintone line. Also with looks 2 there's a skin overlay which shows little dots over the person. The more dots the more the colors are corrected for skin color.
Neutral is easy to grade to get to the skin tone line in the vectroscope. And the image looked close to my subjects skin tone which is fair. The bokeh seemed to stay alittle flat but i wasnt graded for an overall image just the skin tones.
Flaat profiles are just has easy to grade. I applied close to the same correction to get the vectroscope where it needed to be.
Flaat 10n once graded for the skintone line ended up with more of a yellowish tint on the skin. But seemed to have more overall color in the image compared to neutral.
Next was Flaat 10p once graded for skintones gave a nice overall image. The skin color looked very good and the over all image looked nice and more colorful.
Here are the frame grabs of each. I noticed once rendered there was a color shift in the images making them more contrasty and yellowish.

Video of the skin tone test
http://youtu.be/0HAYzA7K3MY
I decided to shoot around the back yard to see how each would grade and to see if there was a shift in color once rendered.
I shot 2 different images both 3 times with each of the profiles. Neutral, Flaat 10p, and Flaat 10p.
All clips were graded the same, I applied the same curve adjustments,contrast and color correction. The color for all 3 look very close. The only difference is the flaat profiles have a brighter overall image.
There seemed to be no color shift after rendering these clips.
Video of grading test
http://youtu.be/kzA_3oiXjEA
After shooting with the flaat profiles I really like the image that flaat 10p provides. It gives a nice image in regards to skin tones and a brighter overall image with nice colors in the highlights and shadows. If your looking to try a profiles that doesn't require a lut curve or one that doesn't add extra noise give the flaat profiles a try.
 |
| t3i kowa 16h Smallhd dp4, Jag35 rails, Sachlter Ace tripod |


Monday, June 25, 2012
ProAm dvc5o jib
After I got a slider and glidecam I knew I needed to add a jib to my gear. I needed something that allowed for fluid vertical shots, and nice sweeping shots.So I did my research around the web, and read reviews and found ProAm. They sell most accessories for cameras, like rigs, monitors, and jibs. ProAm has jibs ranging from 4 feet up to 16 feet. I knew I needed something small, easy for transporting. So I went with the DVC50 a foot jib with a reach of 8 feet in height. Being this small it can easily be used inside as well.
The DVC50 is 4 feet in reach and made of lightweight 6061 aluminum. The jib has high density scratch resistant powder coating and has a tool less design. The DVC50 can hold up to 8lbs and features auto tilting, which keeps the camera level with the ground. The stand extends from 4 feet to 6 feet, giving you around 8 feet total height, and can hold up to 100 pounds.
When I ordered the DVC50, I also ordered the crane stand, which both arrived quickly. The DVC50 and stand are a high quality build and fit together perfectly. Both come with a padded bag and the extra protection is nice. The stand comes in 2 pieces, the legs and the metal pole that raises the overall height. The jib also comes in 2 pieces, the bar and the part that attaches it to the stand. Setting up the jib takes just a minute tops without any tools. Just slide the jib down on the stand and tighten it up. Attaching your camera is done by a 1/4x20 wing nut. I used weights from a local sporting goods store. Finding the counter balance is easy, just add weight until the jib remains level.
The auto tilting feature is a very nice touch the DVC50 offers. The jib stays levels when moving up or down. Movement is nice and fluid both horizontally and vertically. As can be expected, it does take a little bit of practice to get smooth shots.
Overall, I'm really happy with the ProAm DVC50 jib. The build is nice and movement is fluid, packs up small and can be used indoors. The best thing about the jib is the price versus build. I would recommend the DVC50 to everyone.


Test footage of the dvc50
http://youtu.be/DeXjErdqL4Y
http://youtu.be/1hp5nYnZisk
The DVC50 is 4 feet in reach and made of lightweight 6061 aluminum. The jib has high density scratch resistant powder coating and has a tool less design. The DVC50 can hold up to 8lbs and features auto tilting, which keeps the camera level with the ground. The stand extends from 4 feet to 6 feet, giving you around 8 feet total height, and can hold up to 100 pounds.
When I ordered the DVC50, I also ordered the crane stand, which both arrived quickly. The DVC50 and stand are a high quality build and fit together perfectly. Both come with a padded bag and the extra protection is nice. The stand comes in 2 pieces, the legs and the metal pole that raises the overall height. The jib also comes in 2 pieces, the bar and the part that attaches it to the stand. Setting up the jib takes just a minute tops without any tools. Just slide the jib down on the stand and tighten it up. Attaching your camera is done by a 1/4x20 wing nut. I used weights from a local sporting goods store. Finding the counter balance is easy, just add weight until the jib remains level.
The auto tilting feature is a very nice touch the DVC50 offers. The jib stays levels when moving up or down. Movement is nice and fluid both horizontally and vertically. As can be expected, it does take a little bit of practice to get smooth shots.
Overall, I'm really happy with the ProAm DVC50 jib. The build is nice and movement is fluid, packs up small and can be used indoors. The best thing about the jib is the price versus build. I would recommend the DVC50 to everyone.
 |
| bag for the jib and stand |
 |
| stand |

 |
| stand |
 |
| jib connected to stand |
 |
| 1/4x20 wing nut for camera |
 |
| lowest point |
 |
| camera attached |
 |
| counter weights |

 |
| highest reach |
 |
| locking pin |
 |
| SmallHd dp4 for framing |
 |
| SmallHd dp4 |
http://youtu.be/DeXjErdqL4Y
http://youtu.be/1hp5nYnZisk
Subscribe to:
Posts (Atom)